|
Pivotting
It turns out hardware interrupts were the least of my problems. I have a working model of a PCI driver that can scan for hardware devices and connect with them. However, having that also work with the LCD is going to be a challenge. For now, I'm going to delay working on real hardware for now and I'm going to rollback my software version. For now, I'm going to work on my emulated version solely to get all my applications running. Because of the modular nature of my software, I can handle one thing at a time without worry about backwards compatibility. I'm going to work on processes and then I can have multiplexed (multiple running) applications. This will allow the window manager to be frozen and for me to not have to use my context model.
0 Comments
I think this is going to be the final frontier. I have the paged memory working, and my tiling window manager is done. As I continue to finish up the terminal, I think I'm about to leave the low-level land. An observation I have made throughout all this is that many low level procedures and functions are well defined and their optimal implementation have already been solved. A lot of times I realized that programming the APIC and the PCIe drivers is very rudimentary. Now I see that hardware interrupts are the final bridge. Once I have that working, it can actually receive using input on my hardware and put video to the LCD screen, instead of only being interactive on an emulator.
The interrupts, once programmed (I'm going to consult the OSdev discord), will let me get started on writing doom and allowing interactivity with the terminal and calculator. I have done a lot of work doing research for the next step of my fellows. Looking at paging and virtual addressing has been the biggest problem. After successfully implementing a tiling manager wrapper over my window manager, I need to be able to remap memory for me to spawn processes. A process is like an individual task that the CPU is doing. For me to have multiple windows and multiple different types of applications like windows and game graphics, memory management is imperative. If I didn't, it would be an algorithmic mess.
I will being implementing proper paging after being handed off from the BOOTBOOT bootloader. The Tiling System
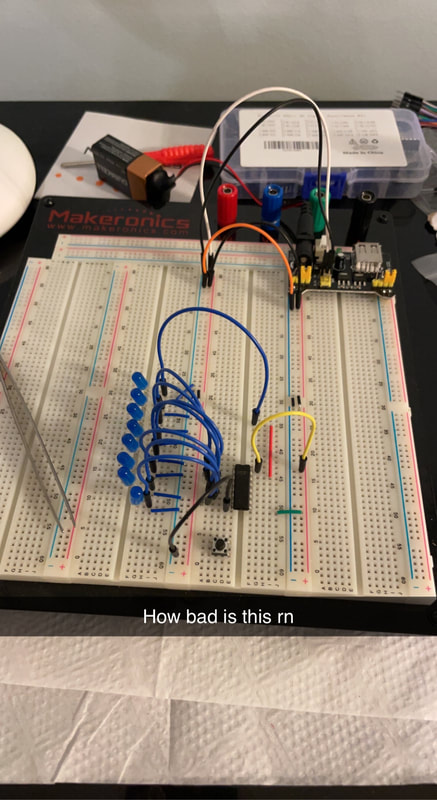
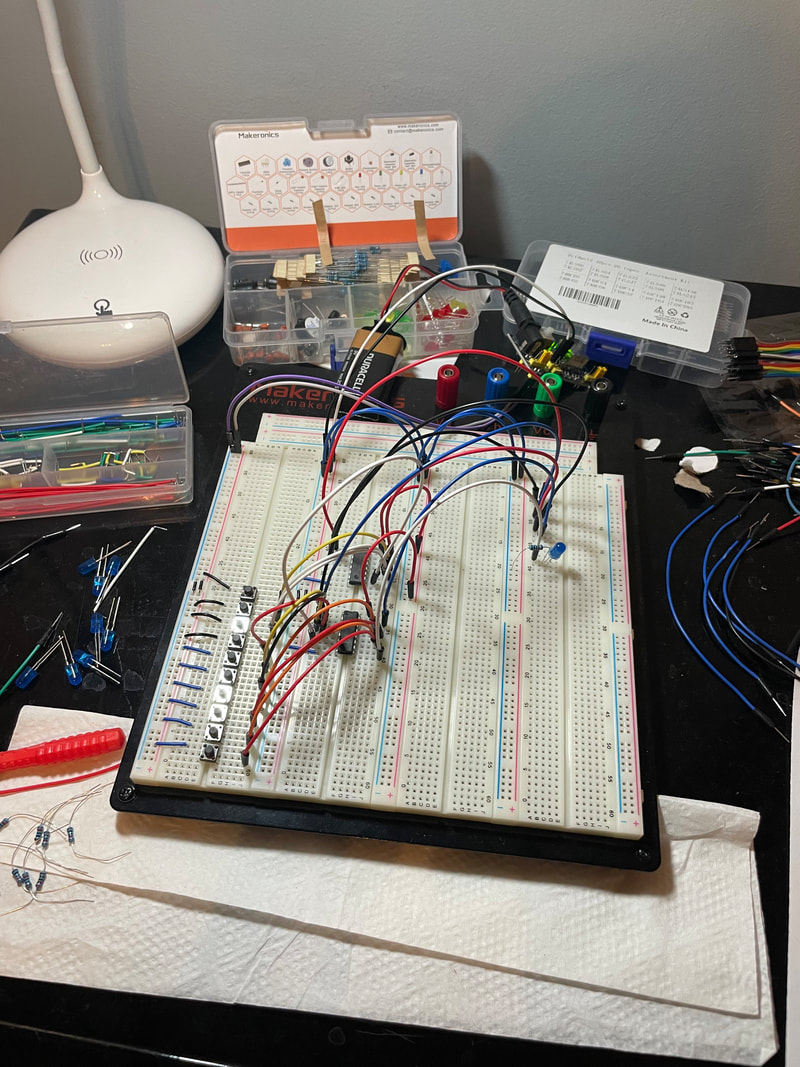
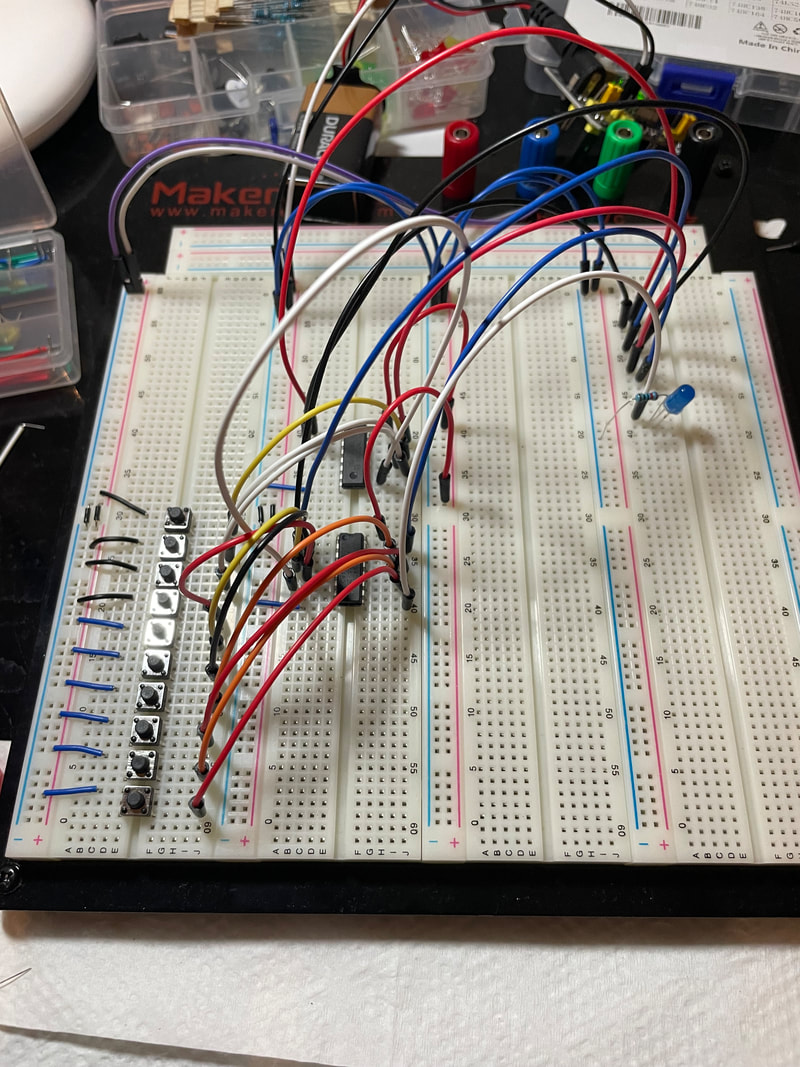
The window manager is done. I had to do a lot of weird C workarounds to get it done with my object syntax, but it works. Once I get my tiling manager done, I can do the basic shell language by putting in a temporary IDT for keyboard input, and then all else will follow. I might use an interface/standardzed API so I can make function calls more quickly. I will have to start implementing processes (scary) to in order to make the shell interpreter work. I might actually consider switching to C++ for the object inheritance even though I know Linus Torwalds would be disappointed in me. I will show the pinouts on my circuit board soon. Breadboards in the making I have made some breakthroughs in the electrical engineering side of the Fellows project, developing the keypad design before I actually put it in a schematic on kiCad and ship it out. After breaking out the more specialized ICs (Integrated Circuits) to put in place on my breadboard circuitry prototype, this is what I had. While this may look like a mess... strap in your seatbelt.
This evolved into a prototype design for my actual keypad setup. Requiring two daisy-chained PISO (Parallel-In Serial-Out) and SISO (Serial-In Serial-Out) shift registers I could set up the wiring needed to handle the outputs, as well as connecting all the pins and wires necessary to control the flow of data with a microcontroller.
You can see how the example buttons are just switches on the left, with 9 to test out whether I can daisy-chain inputs. I then have all of them connected to the inputs of the two shift registers, and through some electrical black magic, the output is sent to the right side of the board. There are more connections on the right, each of which correspond to different control lines meant to regulate the procedure of how data was transferred on the left. In the below image you can see how they're all hooked up to GPIO (General Purpose Input/Output) pins on a test raspberry pi. I will use a different board for the actual project but for now this will do because it's the same concept. 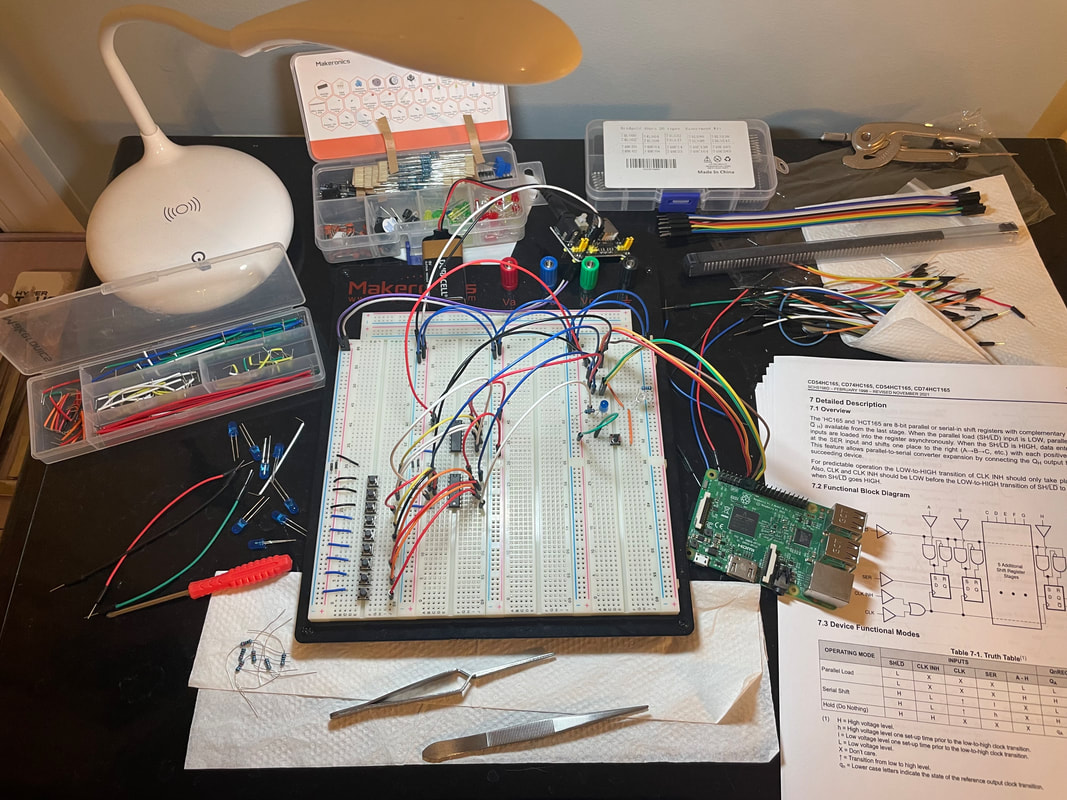 After I complete the code for the first test run of this system, I'm going to pivot back to the software, studying how to interface with the specific model of SBC (Single Board Computer) I ordered on the software-hardware bridge, and I'm going to start designing applications. Paging needs to be reimplemented (I'm looking forward to that one) and I will leave parallel processes to the very end. Stay tuned!
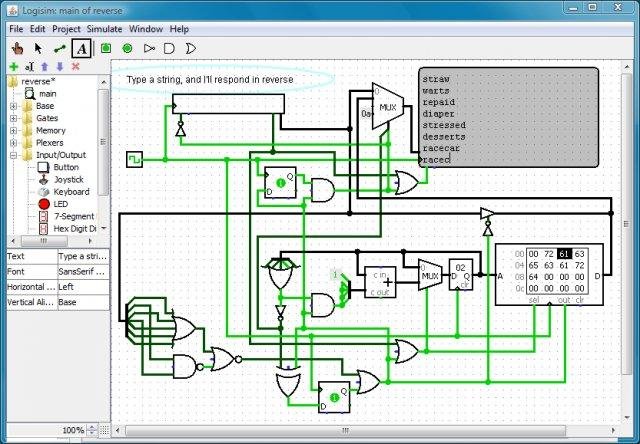
Bootboot Memory Addressing and Fixes With transitioning the boot phase of my operating system to 64 bit with the BOOTBOOT bootloader, there were many features that had to be retroactively reimplemented. This caused a lot of headaches with explicit memory addresses. Since my kernel now has a more advanced memory model, it accesses different important values differently. Now that there's virtual addressing, dealing with memory addresses that aren't actually what they say they are like higher half kernels and the linear framebuffer, many special values had to be changed. Not only that, but the video display mode was changed from RGB 8-bit to ARGB 32-bit. This meant I had to include extra environment variables that could accommodate the different video memory layout. Not only that, but relocation errors caused me to change the design of my font file entirely, which I'll cover in a later blog post once I get everything up and running. Soon, by January 30th, this will be bootable on USB. Breadboard Shenanigans This week, I opened the breadboard kit and other electronic components to start learning the circuits I would need for the keyboard. After assembling the breadboard, I started looking on line for the schematics and designs that I would use for the keyboard. I realized I forgot a few items to buy like a tactile switch for testing and a 555 timer as a clock. However, I'll still be able to test out the basic logic before the more special parts are ordered. Most keyboard matrices use row-column indexing, which means at any given time, they can detect which rows have buttons pressed and which columns have buttons pressed. If you know the row and column of the button pressed, you can determine exactly what button is pressed. 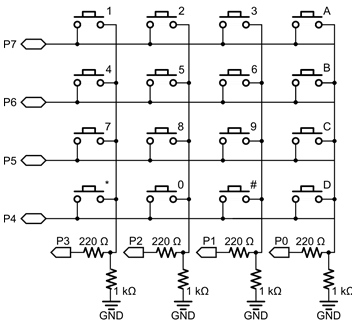 However this can lead to problems if more than one key is pressed at a time. I want to have more general purpose use rather that just calculation for my device, so it's imperative that certain keys can be detected independently of others. This is why I'm using a combination of keyboard matrices and PISO shift register trickery. I'm going to head into logisim to diagram the entire circuit out virtually, then I'm going to use my breadboard to figure if there are any physics bugs I need to iron out.
 Greetings everyone!
The migration to the bootboot protocol is almost complete! Over this winter break, I established my goals to be able to run my operating system on real hardware and study the next steps for this Fellows project. While most of the time in December was dedicated to college applications, I had a great amount of time to rework the project architecture (again) and to configure the development pipeline to allow for bootboot! Achievement 1: 64bit The operating system is officially 64 bit! A 64bit system means that memory addresses and data stores at each memory address takes up 64 bits of data rather than 32 bits. This is what every modern operating system is at. A lot of the internal functionality like setting up the GDT and IDT had to be changed. This is because the processor handles the setup of these very low level structure differently between setting up a new one (previous) and rewriting it (current). More work will have to be done in order to correct these procedures. Achievement 2: Bootboot support Makefile This is where I get to talk about what bootboot actually is. When a processor starts up, it traditionally hands it off directly to the bootloader, stored at the first memory location of the disk. The bootloader performs sanity checks and makes sure the hardware and software environment is ready to be passed off to the kernel. This is where the GDT is 32 bit protected mode is set up, as well as small things like checking cpuid and setting the A20 line which we won't get into. Modern technologies prefer to use a system called UEFI (Unified Extensible Firmware Interface). Intel even declared all their processors released 2020 and beyond would only support UEFI rather than the legacy protocol. UEFI is a standardized way of booting* and provides an API to use so that kernels can be more agnostic to their system. It's also more secure and guarantees a GPT Partitioning system as opposed to the old MBR system. This leads to certain benefits we won't get into. Anyways, setting up UEFI manually is hard. An there's too many datasheets and documentation I'm reading already to try to learn this. This is why I'm using bootboot. It will setup UEFI for me and serve as a wrapper that jumps immediately to my kernel, handing off control in a very similar way to my old bootloader. With this, I can run on real hardware. Currently it's working but I need to sort out an issue with how the kernel decodes screen addressing before I can post an image of the kernel before the migration. It was very simple to make the switch. Due to my forward-thinking and modular approach to my refactored Makefile I referenced in an earlier blogpost, I just had to change the final stages of kernel preparation, shipping it off to the bootboot toolchain to prep it. After configurating my emulation software to resemble exactly the state of a real drive, it blitted the test frame. Soon, we will see this in all its glory. A windowing system was added so when I get this on a real USB drive and boot it on the Severn Cyber Club PC, I will show an image and elaborate more on future goals. *kind of Stay tuned! This has been a very innovative two weeks! I wanted to finally design the UI and window system of the OS, so I drew up mockups of what I want it to look like. I used Figma to prototype out what the windows and design might look like, and the different functionalities I could use. Here are some pictures from my designing process that I will implement into the UI. I'm thinking of having a default skeleton design, and then theming can be applied later.
Of course, the window API that I'm designing will require memory allocation, since windows are so dynamic and can hold such different data that I will need a dynamic memory API at some point. This will allow me to request more memory from the system than planned, so that way I can add more data to the screen, or even create more windows. This memory allocation is a core need of any LIBC library, and this is an investment into the future. At first I opted to use a linked list model to store allocated memory. Essentially, in the BSS memory space, I can transform arbitrary sections of it to be memory blocks, which are at least the size of the required data. The store information about its creation and contain the actual free data that can be used. Importantly they contain pointers to the next and previous memory blocks, meaning that freeing and traversing memory is easy. Below is a diagram. 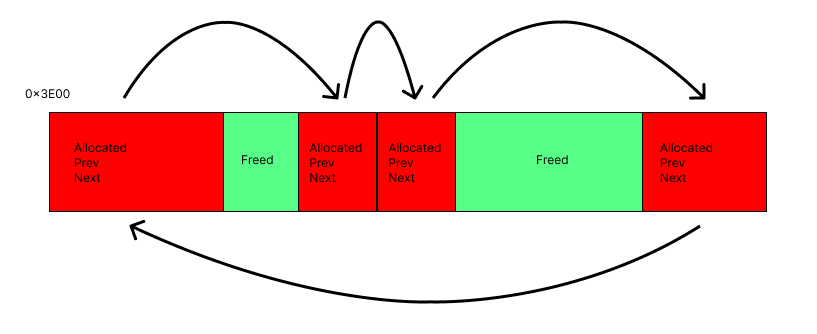 What's important, though is that this is not space-efficient. It requires a lot of extra memory to store the metadata of the memory block, and there is no good structure to find free blocks after I allocated to the end of the BSS allocated space. A better implementation is to chunk the free space into blocks, and have a Memory Allocation Table which tracks whether blocks are used or not. This standardizes the data way more, and calculating free space is much easier. 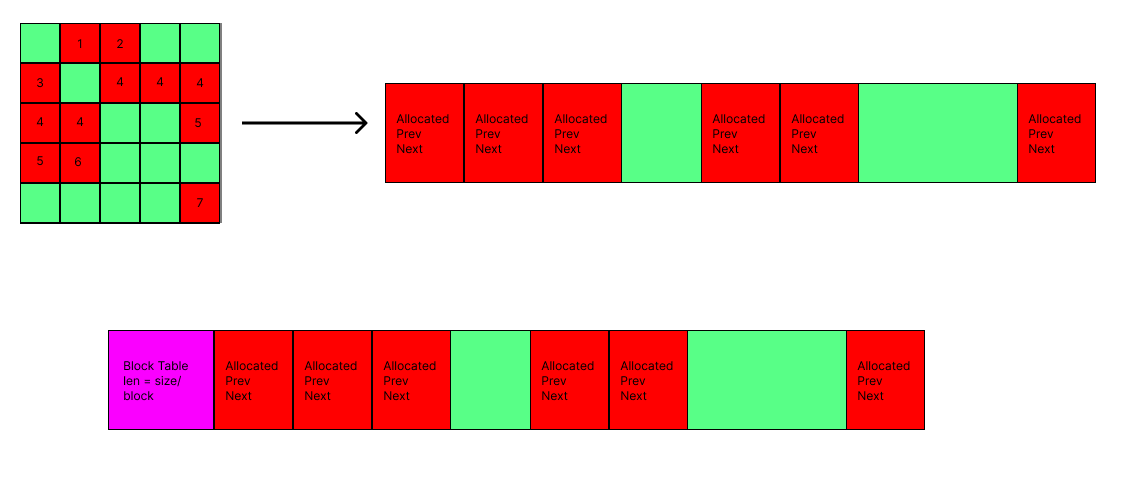 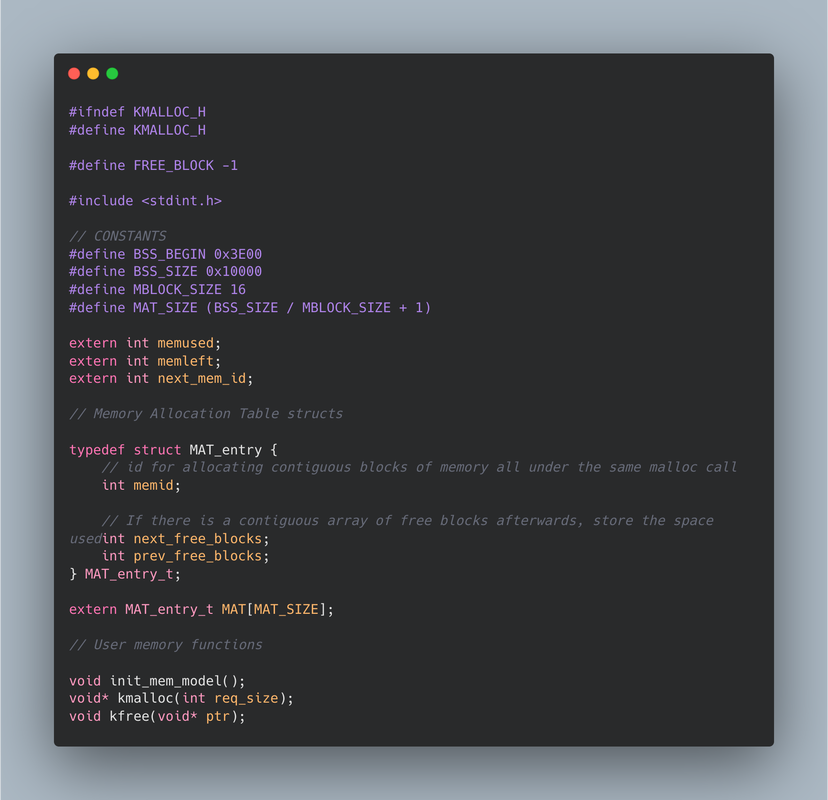 Stay tuned for the actual implementation of the window manager and the UI on QEMU! I'm working on doing the research to port the OS to actual hardware.
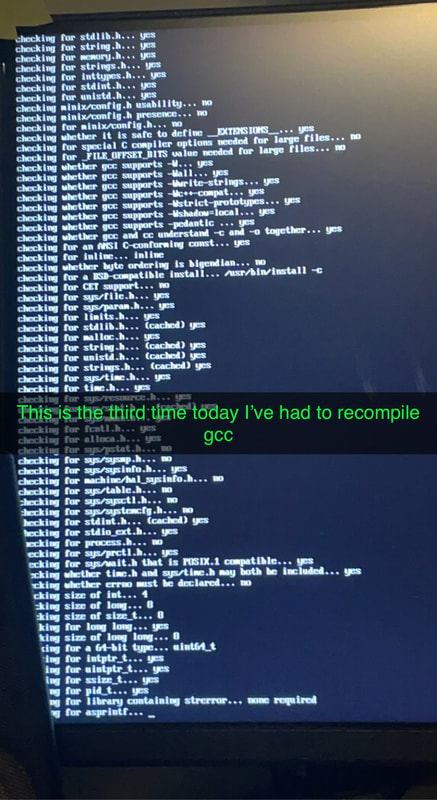
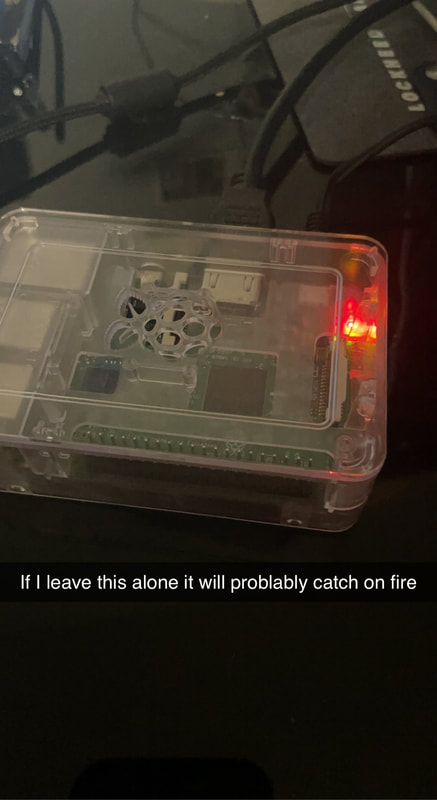
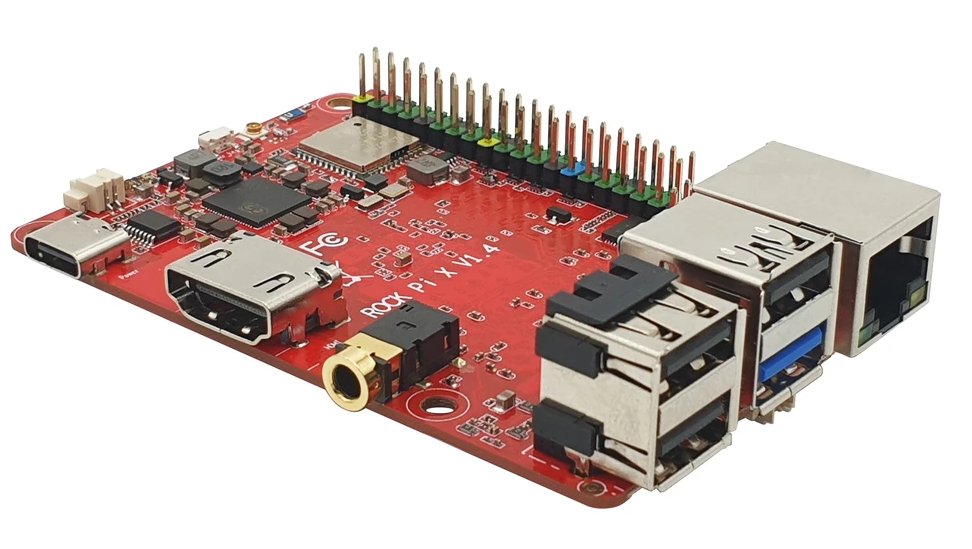
A lot has happened since the last blogpost! My biggest pieces of progress are in three sections: Self-Hosted Development Server My PC is great at building my OS project and running the pipeline, with a custom cross-compiler built specifically for that machine to target the specific architecture of my operating system. My PC has been perfectly specialized to work with this project. However, it's not very... portable. When I want to work on the project away from home, I have no hopes of actually compiling it and seeing if it runs correctly (if at all) or not. This is why I migrated my project to be on a raspberry-pi, another computer than I'm making a server, running continuously, and providing an environment for me to use wherever I am! This server will be running a clone of my repository, but the interesting thing is I've set up SSH (Safe Secure Shell) on it, meaning with the right commands I can access this device without actually having to be near it. After configuring some ports on my home router, I had it up fully ready to go! But then... the compilation. Now I had to recompile the cross-compiler to an Ubuntu docker container (don't ask me why I didn't target the raspberry pi itself I don't know why I did that). This process. Took. 5 hours. But finally, it worked! I can now develop and build the OS from whatever computer and whatever location I want to! 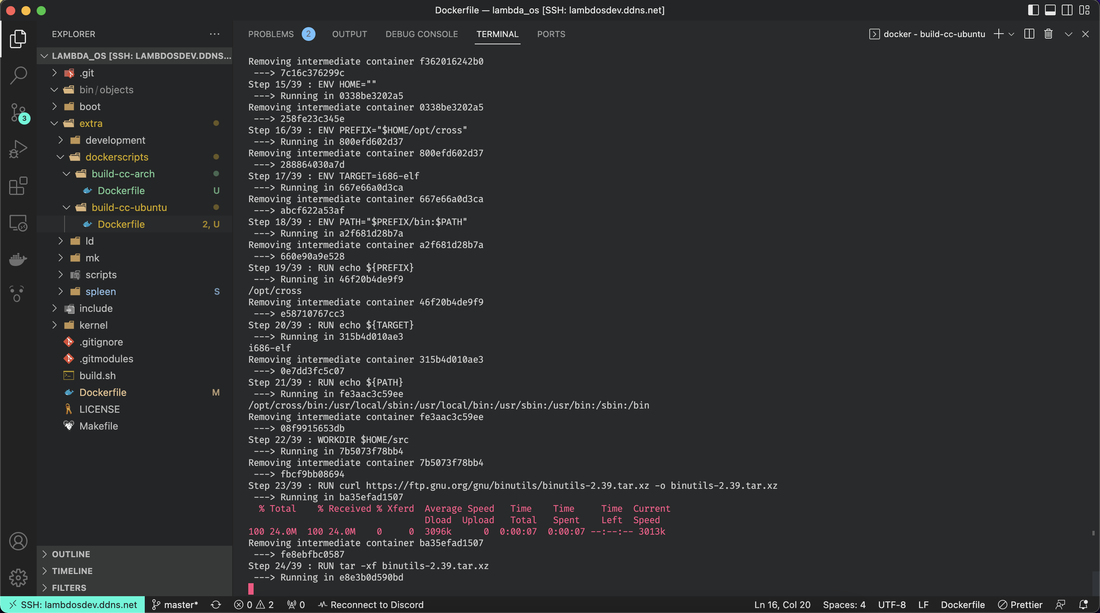
Hey all! These past two week have been quite a ride, and I decided to take a break from coding because of how much typing I have been doing and to save my self some extra headaches. I decided to go into the more creative path of exploration and started designing the programming language syntax and features. I've also started drafting my requisition forms for the breadboard kit, circuit board programs, and processor. I will upload my notes of the programming language design when I get a hold of them again. For now, let me explain what goes into a compiler and interpreter. 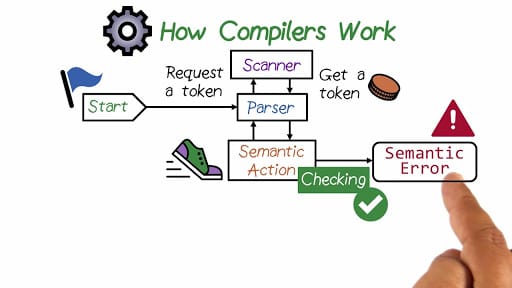 A standard interpreter has two main parts: a lexer and parser. A lexer takes in the text and spits out tokenized symbols that represent each word or statement in the code. By transforming text into tokens, it makes the job of actually interpreting and translating the code much easier. The parser takes these tokens and constructs and AST or Abstract Syntax Tree, which represents all the token in a semantic data structure, similar to how we represent English sentences. An AST lends easily to operator precedence, optimization, and advanced syntactic sugar.
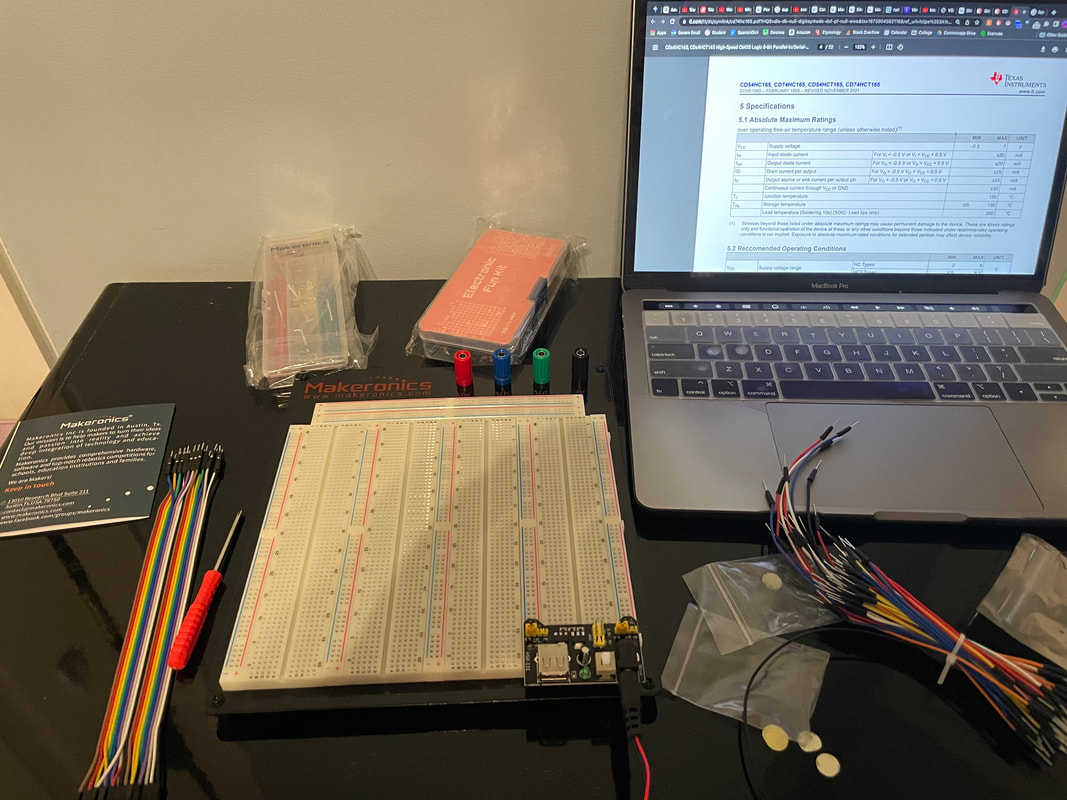
Requisition Forms I'm currently finalizing my research for the things I need to get to start my EE and quickly pump out a prototype so I can tinker with it. I have three main things I'll need to get:
|
AuthorWrite something about yourself. No need to be fancy, just an overview. Archives
November 2022
Categories |

 RSS Feed
